Showing posts with label cheese. Show all posts

Wednesday, September 21, 2011

Potato Au Gratin


I am a big fan of comfort food, as you may have gathered from some of the recipes on this blog. One of my favorite comfort foods is pretty much anything to do with a potato really, because lets be honest they are just so fluffy and creamy and of course yummy! Now as a kid I remember my mother making this dish but mostly for special occasions and I can see why as it is a bit labor intensive. Now if you have mandolin its easy peasy, which I did, so this went by pretty quick. But it is oh so worth it with this creamy, cheesy bubbly goodness. I found this recipe on Food Network and pretty much followed it to a T, except some extra cheese for the top to get that crispy, bubbly, gooey, cheesy top.

Items Needed:
Baking Dish

Preheat oven to 350 degrees
Prep Time 15
Cook Time 1 hr 30 mins

  • 1/3 c. unsalted butter, softened
  • 1 1/2 lbs potatoes peeled and sliced, 1/4 in thick ( I used a mandolin)
  • 1/2 c. plus extra for top, grated Gruyere cheese  
  • 1/2 c. plus extra for top,freshly grated Parmesan cheese  
  • 1 c. heavy cream
  • 1 tsp. salt
  • 1/2 tsp. black pepper
  • 1/8 tsp. paprika 


  1. Grease the baking dish with about 1 tbsp of the softened butter.
  2. Arrange a layer of potatoes in the baking dish and sprinkle the cheeses over them. Continue layering potatoes and cheeses until you've used them all ending with a layer of potatoes.
  3. In a small bowl, whisk the cream with the salt and pepper; pour this over the potatoes. Dot the remaining butter over the top and sprinkle with the paprika. Sprinkle some more cheese on top to finish it off.
  4. Bake for 1 to 1 1/2 hours, or until the potatoes are tender and golden brown on top.
  5.  Let stand for 5 minutes before serving.


Eat and Enjoy!!!

Monday, June 6, 2011

Shepherd’s Pie stuffed Potatoes


Once again back to the Rachel Ray’s Look and Cook book, I think this has been our most used cookbook this month.  This is at least recipe number 2 or 3 from this book, our first one was the awesome Artichoke and Spinach Mac and Cheese.
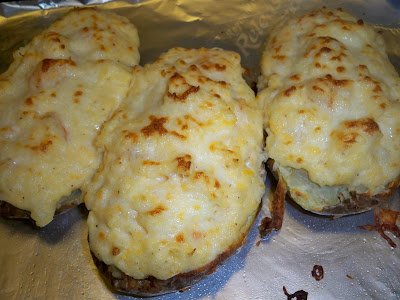
The weather last week was awful for Spring with quite a chill in the air like a cool crisp fall morning. So that meant a toss up on what to make except it had to be something warm and comfy of course. I asked the hubby what he was in the mood for and of course got the “ It’s 8 in the morning how can I think dinner??” So I broke out the Look and Cook book because like the title says you can look and then cook, aka it has pictures. I started to flip thru it and bam, he stopped me at this recipe, well the picture of it. And voila dinner recipe is chosen. Of course you know we changed it up a bit, this time because well that’s what we do. Hubby doesn’t like mushrooms, so out they went, and we’re off beef, so sub in Turkey, and we ended up going for a more traditional shepherds pie sub in corn and peas**. These were so delicious that we ate them right away and then I gave some to my parents so I didn't get a melted cheese picture but you get the idea. Of course got this recipe got the wheels turning.. You could stuff potatoes with so many things.. Check out my Shrimp Stuffed Potatoes here

So here is our version of Rachel’s Shepard's Pie Potatoes recipe.

Shepard's Pie Potatoes 

Items Needed:
Skillet
Baking Sheet

  • 8 Russet Potatoes, scrubbed clean
  • 3 tbsp EVOO
  • salt

  • 1 lbs ground turkey
  • 2 tbsp soy sauce
  • 2 tbsp Worcestershire sauce
  • 1/4 c ketchup more to taste
  • garlic powder
  • salt
  • pepper
  • 1 package Steamfresh frozen corn, prepared according to package directions

  • 1/4 c milk
  • 2 tbsp margarine 
  • 1/4 c sour cream
  • 6 slices bacon, cooked and crumbled
  • Cheese, shredded 

  • Rub potatoes with the EVOO, and sprinkle with salt than place the potatoes on a foil lined cookie sheet, bake for one hour ten minutes. Remove the potatoes and allow them to cool
  • When the potatoes are cool enough to work with using a sharp knife carefully cut a thin top slice off each one and scoop out the potato flesh, set aside to whip up later. Place shells back on cookie sheet and set aside 

  • In a mixing bowl add the sour cream, milk, and margarine with a hand mixer set on 3 whip the potatoes until a creamy consistency 
  • Meanwhile brown the turkey in a large skillet over medium high heat with 2 tbsp EVOO for about 5-6 minutes, breaking up the lumps as it cooks, add the Soy sauce and Worcestershire and cook another minute than add the ketchup. Adding more or less depending on your preference remove from heat and set aside wiping the skillet clean to use for the bacon 

  • Heat up the skillet to medium high and cook bacon until just crisp ( dont over cook it will cook more in the oven)
  • Fill the potato shells with the turkey and corn mixture and then top with the whipped potatoes and pop back in the oven for 8-10 minute and than remove to put on topping
  • Top the potatoes with the bacon then pile on the cheese and put back in the oven until cheese is bubbly 

Heres where we forgot to take a picture of the bubbly cheese.... They looked so yummy.. oh well next time!
    ** Ok forgot about the peas... time just got away from me and for some reason I left them out.. guess that means we need to make this again since it was so yummy and try it with peas!!

      Friday, May 20, 2011

      Spinach and Artichoke Mac and Cheese

      Over Chrismakuh I exchange gifts with the girls in my office, we do secret santa, and this year I lucked out, not only did I get a lot of cute little stuff  I also received Rachel Rays cookbook, Look and Cook. I love it, there are so many great recipes, some that we have already made over and over again because we love them so much!! There are several recipes that we earmarked to make and this is one of them. We love all things Mac and Cheese and also love to experiment with different kinds, and this was one we hadn't made at home yet. So when I saw this easy to make and easy on the eyes recipe, I had to make it. In my version I used canned artichokes only because that was what I had on hand but it tasted great anyway. So once again use what have.... 

      Spinach and Artichoke Mac and Cheese 
      ever so slightly adapted from :

      Items Needed:

      Large Stock Pot
      Large Saute pan 
      Casserole Dish

      • salt
      • 1 lb Penne pasta
      • 2 tbsp EVOO – Extra Virgin Olive Oil
      • 3 tbsp butter
      • 1 med onion, finely chopped
      • 3 cloves garlic, finely chopped 
      • 3 tbsp flour
      • 1/2 c. white wine
      • 2 c. milk
      • Freshly grated nutmeg, about 1/4 teaspoon or to taste
      • 1 10-oz box frozen chopped spinach, defrosted and wrung dry in a kitchen towel
      • 1 can quartered Artichokes, slice in half again if desired 
      • pepper
      • 1 1/2 c. Fontina cheese, shredded , plus additional for sprinkling on top
      • 1 1/2 c. Parmigiano cheese, grated,  plus additional for sprinkling on top 

      • Bring a large pot of water to a boil for pasta, salt water and cook pasta to al dente.
      • Meanwhile, place a medium pot over medium-low heat adding 2 tbsp olive oil, and the butter. Add the onion and garlic to the pan and cook the veggies until very soft, about 10 minutes. Then heat the broiler and position rack in the middle of the oven. 
      • Turn the heat up to medium-high and sprinkle the flour into the pan. Cook for about 1 minute then whisk the wine into the pan, cooking for another minute to burn off the alcohol
      • Whisk the milk into the pan and bring up to a bubble. Add the nutmeg, spinach, artichokes, salt and pepper to the sauce and simmer until thickened and vegetables are warmed through, 2-3 minutes more. Add 1 cup of each of the cheeses to the sauce and stir until melted.
      • Toss the prepared sauce with the cooked pasta and transfer to a casserole dish. Sprinkle some more Fontina and Parmigiano over the top and bake until the cheese has melted and the top is golden brown, about 30 minutes.


            Eat and Enjoy!!!!!

            Tuesday, January 25, 2011

            Shrimp Stuffed Potatoes


            I was once again trying to figure out what to make for dinner, when I did an inventory of what we had. Hmmmmm besides some leftovers that were going to be lunch for work the next day, I had frozen shrimp and two potatoes. So I hit goggle with a shrimp and potatoes search and the first to pop up was the queen of butter Paula Deans recipe for Shrimp Stuffed Potatoes.Now the irony in this is that my hubby finds her quite annoying… her voice really and the laugh... Whenever he comes home and she is one bam channel change, I like some of her recipes but he does have a point who can be that jolly all the time. I was skeptical of the recipe I'll admit it, but than thought why not we eat shrimp and we eat potatoes all the time so why not together. I have to say it was sooooo good, and we were so glad we tried it. It was creamy and delicious and quite a comforting meal.  This would also be great served as a surf and turf, you’ll also have your “side" with the potato. 


            Shrimp Stuffed Potatoes 

            Items Needed :
            Baking sheet
            Preheat oven to 350 degrees


            • 2 large  potatoes, washed and dried
            • Vegetable oil, for coating
            • 2  tablespoons butter
            • 3/4  cups grated cheddar cheese, plus more for sprinkling
            • 3/4  cups grated Monterey Jack
            • 3/4  cups sour cream
            • Salt and pepper
            • 1 pound shrimp, peeled, and chopped
             
            • Coat each potato with vegetable oil, place on foil covered pan, and bake for approximately 1 hour.
            • Heat saute pan over medium heat, season shrimp with salt and pepper than saute until browned but not cooked all the way thru, set aside 

            • Remove the potatoes from the oven and slice in half, gently scoop out the potato and place the potato shells back in the oven to crisp up a bit about 5 mins or so
            •  Meanwhile in a bowl place the potato with the butter, sour cream, salt, and pepper. Using a mixer on high, mix the potatoes than fold in the shrimp and both cheeses into the mixture. 

            • Gently stuff the mixture back into the potato shells, making sure not to break them. Pile the mixture as high as you can on top of the potato shells. 

            • Sprinkle each potato with cheese and bake in the oven for approximately 20 to 30 minutes until browned on top. 
            Disclaimer:  Me and the hubby tried these with some BBQ sauce and they were oh so good!!! If you dare try it you wont regret!!


            Eat and Enjoy!!!

              Friday, October 1, 2010

              Stuffed Peppers


              One of our favorite comfort meals in our house is Sloppy Joes, and one that my hubby loves to make. So last week he made a big ole batch of it for us. We kicked of Sunday football with Sloppy Joe sandwiches.. 
              But why is this post titled Stuffed Peppers than, because I have already blogged about Sloppy Joes and this is a great way to use up the leftovers. I have said many a time, that I am a big fan of using leftovers to create a different meal. 

              This one was a big hit in our house, I have made stuffed peppers before, just not this way but with the Sloppy Joes it was fab!!! 


              Stuffed Peppers

              Items Needed:
              Baking Dish
              Small sauce pot


              Preheat oven to 400 degrees


              • 3 Peppers top cut off and deseeded
              • Sloppy Joe Mixture
              • Spaghetti, broken into 1 inch pieces
              • Shredded cheese
              • Bring a pot of water to a boil, toss in spaghetti and cook until just under al dente
              • Mix the spaghetti with the sloppy joe, and stuff the pepper and place in a shallow baking dish
              • Some people boil pepper shell before baking, I do not, I pour water around the pepper in the baking dish about half way up the side of the peppers, this softens them just enough
              • Bake for 25 minutes than sprinkle with some cheese and bake until cheese is melted and slightly browned

              Eat and Enjoy!!!! 

              ** Took picture before water and cheese.. use your wonderful imagination... ; ) 

              Saturday, June 19, 2010

              Chicken Quesadillas


              As I have written before my hubby works most nights and that means I am on my own for dinner. Some times he makes it home at a reasonable hour and I wait others I'm just too hungry so I eat solo. The other night I was really torn wasn't really craving anything until I opened the fridge and saw the leftover roasted chicken from the other night and some cheese....Quesadillas it was!!! I love Mexican food, and this is a quick and easy meal that can be made for one or a whole gaggle of peeps.


              Chicken Quesadillas

              Items needed:
              Non Stick Skillet


              • Chicken, cooked and shredded
              • Shredded cheese, I used a Mild Cheddar, you can use what you have
              • salsa
              • sour cream
              • flour or corn tortillas( 2 tortillas per quesadilla)

              •  I mix the chicken and the salsa together to keep the chicken moist while cooking, so mix them  together and set aside.


              • Over medium heat warm up tortilla, one minute, sprinkle cheese, than layer the chicken and some more cheese, remember I LOVE CHEESE!! cook for 2 minutes to let the chicken heat up and cheese melt


              • Place the 2nd tortilla over the filling and give a little press with your finger so that the top tortilla grabs onto the cheese for the flip. Cook for another minute or so
              • Using a big spatula and being very careful flip the the tortilla over to brown the other side.
              • Slice in quarters and serve with more salsa and sour cream for dipping....Yummy !!!

              Eat and Enjoy!!!

              Friday, May 21, 2010

              Taco Casserole


              We love taco's at out house and I have been craving them all week.  So when I remembered that I had some frozen taco meat in the freezer my plan was in full effect!! Then I realized that oopps I had no taco shells, and it dawned on me that I had shredded potatoes in the freezer and that taco casserole it would be.... If I do say so myself it was delicious So here is my version of Taco Casserole. Did I mention it that it is quick and easy..

              Taco Casserole

              Items Needed:
              Baking Dish
              Skillet


              Preheat oven 
              425 degrees


              • 1- 1/2 lbs ground beef, taco flavor, I had some in the freezer if you don't brown beef as you normally would with some taco seasoning. 
              • 1 can corn 
              • 3/4 can black beans,strained and rinsed thoroughly
              • 1/2 bag shredded potatoes ( I used Ore Ida) 
              • olive oil
              • 1/4- 1/2 c salsa
              • Mexican blend shredded cheese
              • sour cream
              • salsa 
              • hot sauce
              • Heat olive oil over medium high heat and brown shredded potatoes, stir constantly so you don't burn the potatoes, brown for about 4-6 minutes until slightly golden on edges, set aside potato topping
              • In a large bowl, mix ground beef, corn and  black beans and spread into bottom of baking dish, adding a layer of salsa enough to cover meat mixture
              • Bake without potato topping for 10 minutes, than add the potato topping and bake in oven for 20 minutes or until edges and top are brown and bubbly add cheese and broil for 2 minutes keeping a watchful eye on it because everyone's oven is different ( I switched on the broiler for a few minutes to get the top nice and brown and bubbly)
              • Serve with salsa, sour cream and a dash or two of hot sauce yummy!!!!
               
              Eat and Enjoy!!

              Tuesday, May 18, 2010

              Bacon and Smoked Gouda Stuffed Burgers


              Looks innocent doesn't it... Once you cut into it and the cheese slowly starts to ooze out its all over, at least for me it is. I am not what you would call a burger lover, but since we got a nice weather reprieve this weekend my hubby took advantage and we grilled. He decided to go for burgers, and when he told me they would be stuffed with cheese, bacon and caramelized onions how could I say no. I've said it before and I will say it again we are bacon lovers here.....It's always better with bacon right!!  I am also a BIG cheese fan, so much so that for Christmakuh a few years ago my hubby got me a subscription to the Cheese of the Month club, and a cheese charm for my charm bracelet. So cute! For these burgers he went with an Applewood Smoked Gouda which we had tried with the Cheese Club. He did not disappoint, they were delicious!! 


              Stuffed Burgers

              Makes enough for 2 burgers

              • 1 lb ground beef 
              • 2 slices Smoked Gouda cheese 
              • 2 slices bacon, cooked
              • Caramelized Onions 
              • bbq sauce, optional
              • condiments of choice, ketchup, mustard, mayo 

              •  Season meat with some salt and pepper, we also add some BBQ sauce which is optional
              • Separate meat into four squares, you need two for each burger, form each square into a patty (on the thin side because you will use two patties for each burger)
              • Cut each piece of bacon so that it can be put in the center of the patty, then add a layer of cheese. Do this for two of the patties, leaving two patties for the tops
              • Spoon on some of the caramelized onions and place the second patty on top, taking care to seal the edges of the two burgers together
              •  Cook burger to your desired doneness, we grilled ours for about 6 1/2 - 7 minutes on each side.

              ****** I listed condiments such as ketchup and mustard we did not use any so give it a shot without and add if you must... But I think they are great without them!!!

              Eat and Enjoy!!

              Tuesday, April 27, 2010

              Shells Baked with Tomato, Cream, Corn and Five Cheeses

              There is a great restaurant not to far from us in Providence, RI named Al Forno , they are known for their baked pasta's and not taking reservations..... You have to get there early or be prepared to have a drink or two at the bar. But let me tell you it is worth it, not only are the pasta's amazing they make seasonal tarts that are to die for.  So whats the next best thing to eating there, having their cookbook so you can make some of their yummy dishes from the comfort of your own kitchen. Well I didn't have the cookbook, but my mother did so the last time I visited my mom's house I stole I mean borrowed the cookbook, On Top of Spaghetti and boy am I glad I did!! Oh the recipes, I could make one everyday and be one happy camper!! They always use the freshest ingredients and the recipes are so simple and easy.

              I have two favorite pastas dishes there, Baked Pasta with Pumpkin and the Baked Shells with Five cheeses which they didn't have in the cookbook, but they had something better!! A slightly different version of the dish this one with tomato and corn. There is nothing more comforting then a baked pasta dish and this one does not disappoint! Disclaimer: it is very rich and creamy which for me equals YUMMY!!! Hope you enjoy our version as much as we did.


              Shells Baked with Tomato, Cream, Corn  and Five Cheeses

              Items needed:

              Baking dish
              Big bowl

              Preheat oven to 500 degrees


              • 2 C Light cream*
              • 1 cup pureed tomato*
              • 1/4 c Percorino Romano, grated
              • 3/4 C Fontina cheese, shredded
              • 2 tbsp ricotta cheese
              • 4 tbsp Gorgonzola crumbled
              • 2 small balls fresh mozzarella, sliced
              • 1/2 - 1/4 tsp sea salt
              • 2 cups fresh cooked corn kernels
              • 1 lb shell pasta
              • 4 tbsp unsalted butter


              • Bring a large pot to a boil
              • In large bowl, combine all the ingredients except the pasta and the butter,stirring well to combine
              • Salt water generously and drop the pasta , parboil the pasta for 5 minutes, stirring often. Drain pasta ( it will be to hard to eat; it will cook further in the oven) 
              • Add the pasta to the large cheese mixture, and toss to combine, divide into 6 to 8 small gratin dishes or one medium size baking dish.
              • Dot with butter and bake until bubbly and brown on top about 10 minutes. You can test a shell for doneness just be careful it's very hot!!!


              *********** The original recipe called for heavy cream... I wanted to cut some fat so I used the light cream we thought it came out fine, but if you prefer heavy it is the same measurement.
              *********** The original recipe called for 1 c canned chopped tomato, I am not a big fan of chunky tomatoes but I love all products of the tomato IE: tomato sauce, ketchup, pureed tomatoes..you get the picture...so I subbed in pureed tomatoes for the chopped and loved it!!!


              Eat and Enjoy!!!

              Sunday, March 7, 2010

              Yummy Cheese Pizza


              I have had a really busy week and was pleasantly surprised when I called my husband on Friday night and he said he had already started dinner. When he told me it was pizza I was even more excited. I love pizza and was craving it all week. He decided to make a half an half pizza, the best of two worlds. Half yummy cheesy goodness and half with bacon and cheese. Come on who doesn't love Bacon? It hit the spot and there was enough for lunch the next day, which was much needed since I was having the family over for my mother in laws birthday dinner. Stay tuned this week for the yummy recipes for the Birthday Dinner..... 

              Here's my hubbys recipe: 


              Cheesy/Bacon Pizza

              Items Needed:
              Skillet
              Pizza Stone

              • Pizza Dough, Homemade or like us a can of Pillsbury thin crust
              • Tomato Sauce, again Homemade or like us Raos
              • Shredded cheese 
              • Bacon, chopped 
               
              • Cook bacon in skillet on medium high heat until nice and browned, with a slotted spoon scoop up the bacon and set aside
              • Roll out pizza dough and prick dough with a fork or use the prickly side of a meat mallet ( that's what I did ) it helps it from puffing up and prebake for about  5 minutes
              • Spread sauce over  dough adding bacon to half of the pizza, then spreading cheese over the entire pie. 
              • Bake 12- 14 minutes or until bubbly and yummy!! 
               
              What are your favorite pizza toppings????

              LinkWithin

              Related Posts with Thumbnails